How to Install Peel-and-Stick Wallpaper for a Budget-Friendly Makeover
In this guide, we’ll break down everything you need to know: from the benefits and drawbacks of peel-and-stick wallpaper to a step-by-step installation guide.

Peel-and-stick wallpaper has become a rising star in the world of home décor. With social media feeds showcasing stunning before-and-after transformations, more homeowners and renters alike are curious about this DIY-friendly solution. But the question remains—how to install peel-and-stick wallpaper for a budget-friendly makeover, and more importantly, are they truly worth the hype?
In this guide, we’ll break down everything you need to know: from the benefits and drawbacks of peel-and-stick wallpaper to a step-by-step installation guide, plus insider tips to help you get the best results. Whether you’re looking to revamp a small accent wall or completely transform a room, this article is your go-to resource for navigating this trendy home improvement hack.
What Is Peel-and-Stick Wallpaper?
Peel-and-stick wallpaper, also known as self-adhesive or removable wallpaper, is a modern alternative to traditional wallpaper. It comes with a pre-applied adhesive backing, allowing you to simply peel off the protective layer and stick it directly onto your wall—no glue, no paste, and no mess.
This makes it especially appealing to DIY enthusiasts and renters who want a stylish, reversible design upgrade without committing to permanent changes.
Benefits of Peel-and-Stick Wallpaper
Before diving into how to install peel-and-stick wallpaper for a budget-friendly makeover, let’s take a look at why this option is becoming a go-to for affordable home makeovers:
1. Easy Installation
Forget about wallpaper glue and complicated tools. Peel-and-stick wallpaper is incredibly user-friendly, even for first-time DIYers. All you need is a clean wall, a smoothing tool, and some patience.
2. Cost-Effective
Compared to traditional wallpaper or hiring professionals, peel-and-stick varieties offer a budget-conscious way to achieve a high-end look. You can revamp a room for a fraction of what a paint job or wallpapering service might cost.

3. Removable and Repositionable
Made a mistake during application? No worries. Most removable wallpaper is designed to be repositioned during installation and removed without damaging the walls, making it perfect for renters or frequent redecorators.
4. Wide Range of Designs
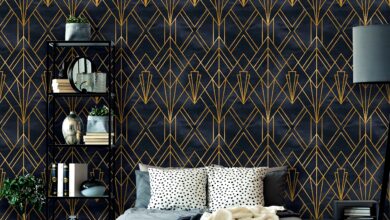
From bold geometric patterns to minimalist textures and faux finishes like brick or wood, peel-and-stick wallpaper comes in a huge variety of styles. It’s an easy way to express your personal style and refresh your space instantly.
Are Peel-and-Stick Wallpapers Worth the Hype?
Yes—and no. Like most home improvement products, peel-and-stick wallpaper has its pros and cons. Here’s what to consider before investing:
✅ When It’s Worth It
- You’re decorating on a tight budget.
- You want a non-permanent design solution.
- You enjoy DIY projects.
- You need to update small spaces like bathrooms, entryways, or nurseries.
❌ When It Might Not Be Ideal
- You have textured or uneven walls (adhesion can be tricky).
- You’re covering a large space and want seamless results.
- You’re expecting it to last 10+ years—most removable wallpapers are best for temporary use (2–5 years).
So, are peel-and-stick wallpapers worth the hype? If you’re looking for a budget-friendly home decor solution that’s stylish, temporary, and easy to install, the answer is a resounding yes.
How to Install Peel-and-Stick Wallpaper for a Budget-Friendly Makeover: Step-by-Step
Now, let’s get into the heart of the matter—how to install peel-and-stick wallpaper for a budget-friendly makeover. Here’s a detailed step-by-step guide to help you do it like a pro.
Step 1: Measure Your Space
Before purchasing your wallpaper, measure the height and width of your wall(s) and calculate how many rolls you’ll need. Always buy a little extra to account for pattern matching and trimming errors.
Pro Tip: Order all rolls at once to ensure consistent color and print, as slight variations may occur between batches.
Step 2: Prep the Walls
Clean walls are key for proper adhesion.
- Wipe down the surface with a damp cloth or mild soap solution.
- Remove nails, hooks, or outlet covers.
- Let the wall dry completely.
Avoid applying on textured walls, freshly painted surfaces (wait at least 4 weeks), or damp areas unless the wallpaper is labeled as moisture-resistant.
Step 3: Mark Your Starting Line
Use a level and pencil to draw a vertical guide line on the wall. This helps ensure your first panel goes up straight—which is crucial because even a slight tilt will become very noticeable over time.
Step 4: Peel and Stick
Start at the top of your first wallpaper panel and peel away about 6–12 inches of the backing. Align the top edge with the ceiling (or your chosen starting point), and press it onto the wall.
Smooth it down using a wallpaper squeegee or credit card, working out air bubbles as you go. Peel off more of the backing gradually and continue smoothing until the entire panel is adhered.
Step 5: Match the Pattern
For panels with patterns, align the next strip carefully to maintain a seamless look. Overlap slightly if necessary, and trim excess material with a sharp utility knife.
Pro Tip: Use a straight edge for cleaner cuts around baseboards and trim.
Step 6: Final Touches
Once all panels are applied:
- Smooth out any remaining bubbles.
- Reattach outlet covers and decor.
- Step back and admire your upgraded space!
Where to Use Peel-and-Stick Wallpaper
Peel-and-stick wallpaper isn’t just for walls. It can also be used creatively in various areas of your home, such as:
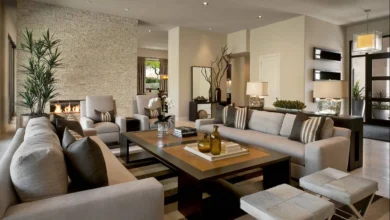
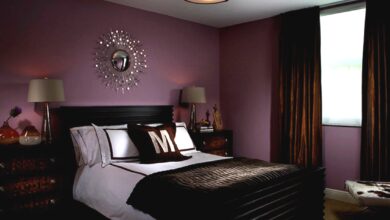
- Accent walls in bedrooms and living rooms
- Bathroom backsplashes (moisture-resistant versions)
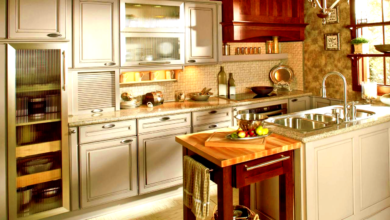
- Kitchen cabinets or pantry doors
- Stair risers
- Bookcase back panels
- Closet interiors
These small updates can make a big visual impact without breaking the bank.
Maintenance and Durability
Most peel-and-stick wallpaper is made from vinyl or a vinyl blend, making it fairly easy to clean. Just use a soft cloth and gentle cleaner—avoid harsh scrubbing or soaking.
Durability varies depending on brand and location. In high-traffic or high-moisture areas, look for wallpapers labeled as washable or extra-durable.
Popular Brands to Consider
Not all peel-and-stick wallpaper is created equal. Here are a few trusted brands with great reviews:
- Tempaper – Known for high-quality, repositionable wallpaper.
- RoomMates – Affordable with a wide range of designs.
- Chasing Paper – Stylish and renter-friendly options.
- NuWallpaper – Easy to apply and remove, perfect for DIY beginners.
- WallPops – Great for kids’ rooms and creative decor.
Frequently Asked Questions
Can I use peel-and-stick wallpaper in a bathroom?
Yes, but make sure to choose one that is labeled as moisture-resistant. Avoid direct water contact unless it’s specifically designed for high-humidity areas.
Will it damage the paint when removed?
If applied to a clean, properly primed wall, peel-and-stick wallpaper typically comes off cleanly. However, it might lift paint if the surface was not fully cured or was already peeling.
How long does it last?
Most removable wallpapers are designed to last 2–5 years, depending on the conditions. Some premium brands can last longer.
Final Thoughts
If you’ve been thinking about refreshing your space without draining your savings, learning how to install peel-and-stick wallpaper for a budget-friendly makeover might just be the answer. It’s affordable, stylish, and shockingly easy to apply—even for beginners.
While it may not be a forever solution, peel-and-stick wallpaper is perfect for those who crave change, love DIY projects, or need a renter-friendly décor option. With thoughtful planning and a bit of elbow grease, you can turn any dull space into a design statement that reflects your personal style.
So yes—they are worth the hype. Especially when the transformation only takes a few hours and costs less than a night out.