10 Easy DIY Home Decor Projects To Try Today
10 easy DIY Home decor project that you are looking to spruce up your living space without breaking the bank? DIY home decor projects are a fantastic way to add a personal touch to your home while unleashing your creativity and easy home decor projects . They allow you to transform your living space into a unique and stylish haven. We’ve got you covered with 10 easy DIY home decor projects that you can try today. So, for DIY Home Decor ,roll up your sleeves, gather your tools, and let’s dive into these exciting and budget-friendly ideas that will make your home shine with personality and charm. So the simply DIY Home Decor creativity is all what you need.
10 easy DIY home decor projects that you can try today:
DIY Home Decor :
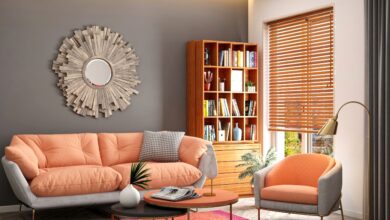
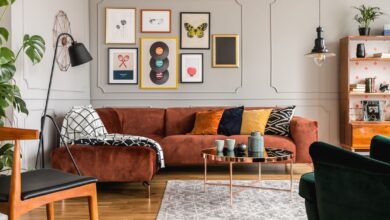
Picture Frame Collage:
- Gather a collection of picture frames in different sizes and shapes.
- Remove the glass and backing from each frame.
- Arrange the frames on a large piece of cardboard or directly on the wall, creating an interesting collage.
- Use double-sided tape or adhesive strips to secure the frames in place.
- Insert your favorite photos or artwork into the frames to complete the display.
Mason Jar Organizer:
- For Mason Jar Organization ,take a few clean, empty mason jars.
- Paint the jars in your desired color or leave them clear for a rustic look.
- Attach the lids of the jars to a piece of wood or directly to the wall.
- Fill the jars with various items like pens, brushes, flowers, or kitchen utensils to create an organized and decorative storage solution.
Washi Tape Wall Art:
- Select a plain canvas or a wooden board.
- Choose different colors and patterns of washi tape.
- Create geometric shapes, patterns, or even write inspiring words on the canvas using the tape.
- Cut the tape to the desired length and stick it onto the canvas, layering different colors and patterns as you like.
For DIY Home Decor , Trim any excess tape and display your unique and colorful wall art.
Floating Bookshelves:
- Find sturdy L-shaped brackets and screws.
- Attach the brackets to the wall at the desired height.
- Stack books horizontally on top of the brackets, leaving the bracket hidden between the bottom of the books and the wall.
- This creates the illusion of floating books and adds an interesting element to your wall.
Upcycled Wine Cork Bulletin Board:
- Gather a large collection of wine corks.
- Arrange the corks on a square or rectangular piece of corkboard or foam board.
- Glue the corks onto the board in a pattern or design of your choice.
- Let the glue dry completely before hanging the bulletin board on the wall.
- Use pushpins to attach notes, memos, or photos to the corkboard.
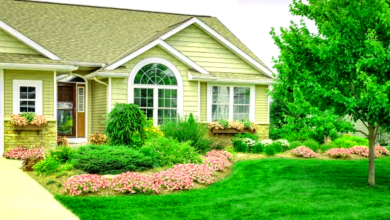
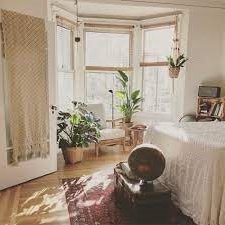
Fabric-Wrapped Plant Pots:
- Select plain ceramic or terracotta pots.
- Choose fabric in your favorite pattern or color.
- Cut the fabric into long strips wide enough to wrap around the pots.
- Apply a thin layer of decoupage glue or Mod Podge to the pot’s surface.
- Wrap the fabric strip around the pot, smoothing out any wrinkles or bubbles.
- Secure the fabric with a small amount of glue at the end and let it dry completely.
- Place your plants inside the decorated pots for a charming touch.
Painted Vases:
- Find clear glass vases or jars in various sizes.
- Clean the vases thoroughly to remove any dust or residue.
- Choose acrylic paints in your desired colors.
- Apply the paint to the inside of the vase, swirling it around to create unique patterns.
- Let the paint dry completely before using the vases as decorative pieces or for holding flowers.
Simply DIY Decorations :Decorative Wall Stenciling:
- Select a stencil with a pattern or design you like.
- Place the stencil against the wall and secure it with masking tape.
- Dip a small sponge or brush into paint and tap off any excess.Carefully dab the paint onto the stencil, making sure to cover the entire design.
- Remove the stencil while the paint is still wet to reveal the pattern.
- Repeat the process with different stencils and colors to create an intricate design on your wall.
Fabric Wall Hanging:
- Choose a piece of fabric with a pattern or texture that complements your decor.
- Cut the fabric into a rectangular or square shape, leaving some extra for a border or fringe.
- Fold over the top edge of the fabric and sew a pocket to insert a wooden dowel or curtain rod.
- Hang the fabric on the wall using nails or hooks.
- To add extra flair, you can attach tassels, beads, or ribbons to the bottom edge of the fabric.
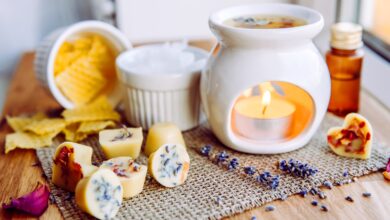
Wine Bottle Candle Holder:
- Collect empty wine bottles and remove any labels.
- Clean the bottles thoroughly and let them dry completely.
- Spray paint the bottles in your desired color or leave them clear for a simple look.
- Insert tapered candles into the bottle openings.
- Arrange the bottles in a cluster or line them up to create an elegant candle centerpiece or a decorative accent for shelves or mantels.
- Remember to always exercise caution and follow safety guidelines when working on DIY projects. Enjoy exploring your creativity and adding a personal touch to your home decor with these easy and enjoyable project
String Art:
- Gather a piece of wood or a corkboard as your base.
- Choose a design or shape you like and print it out or draw it directly on the base.
- Hammer small nails along the outline of the design, leaving some space between each nail.
- Tie one end of a colorful string or embroidery floss to one nail and start looping it around the other nails to create a pattern or fill in the design.
- Continue wrapping the string around the nails until you achieve the desired look.
- Knot the string to secure it and trim any excess. Display your unique string art on a wall or shelf.
- Paper Garland:
- Gather colorful or patterned paper, such as scrapbook paper or wrapping paper.
- Cut the paper into strips or shapes, like circles or triangles.
- Fold each strip or shape in half and glue or staple it to a string or ribbon, leaving space between each piece.
- Continue adding more strips or shapes until you achieve the desired length.
- Hang the paper garland across a wall, window, or fireplace mantel to add a festive and whimsical touch to your space.
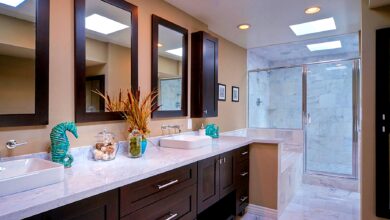
Vintage Tray Makeover:
- Find an old tray with an interesting shape or design.
- Sand the surface of the tray to remove any rough spots or imperfections.
- Paint the tray with a coat of primer, allowing it to dry completely.
- Apply a coat of paint in your desired color, or use a technique like distressing or antiquing for a vintage look.
- Once the paint is dry, you can further embellish the tray with stencils, decorative paper, or even decoupage.
- Use the revamped tray as a stylish serving tray or a decorative display for candles, flowers, or small decor items.
More of DIY Home Decor
Ombre Wall:
- Choose a wall in your home to create an ombre effect.
- Select a paint color in the darkest shade you desire.
- Paint the bottom portion of the wall with the darkest color and let it dry.
- Gradually mix in white paint to lighten the color, creating a gradual transition.
- Paint the middle section of the wall with the medium shade and let it dry.
- Repeat the process, gradually adding more white paint to create the lightest shade.
- Paint the top section of the wall with the lightest color and let it dry.
- Blend the sections together using a dry brush or sponge to create a smooth ombre effect.
Macrame Wall Hanging:
- Purchase macrame cord or rope in your desired thickness.
- Cut several pieces of cord, each measuring around twice the length of your desired wall hanging.
- Fold each piece of cord in half and create a loop at the folded end.
- Attach the loops to a wooden dowel or branch, spacing them evenly.
- Use various macrame knots to create patterns and textures along the cords.
- Experiment with different knots, fringe, and beads to add visual interest.
- Hang your macrame wall hanging on a nail or hook.
Embroidered Wall Art:
- Select a piece of fabric or canvas as the base for your embroidery.
- Sketch or transfer a design onto the fabric using a washable fabric pen or pencil.
- Choose embroidery floss in various colors that match your design. Use basic embroidery stitches like backstitch, satin stitch, or French knots to fill in the design.
Paper Flower Wall Art:
- Choose colored or patterned paper in various shades.
- Cut out flower shapes of different sizes, using templates or freehand.
- Layer the flower shapes, gluing them together in the center.
- Attach the completed flowers to a canvas, foam board, or directly to the wall using adhesive strips or glue.
- Arrange the flowers in a pleasing design, creating a three-dimensional effect.
- You can also add leaves, vines, or other decorative elements to enhance the display.
Upcycled Bookshelf:
- Find an old ladder, wooden crates, or sturdy wooden planks.
- Sand any rough surfaces and apply a coat of paint or varnish.
- Arrange the ladder rungs or crates horizontally, creating shelves of different heights
- Remember to personalize these projects to match your own style and preferences. Have fun exploring your creativity and transforming your living space with these easy and enjoyable DIY home decor ideas! so all these processes describes the actual DIY Home Decor
Conclusion:
So these are the DIY Home Decor projects for you to try are not only fun to make but also allow you to express your creativity and personalize your living space. Enjoy the process and have fun decorating!