What to Expect When Working With a Home Builder
Working with a home builder involves several key stages, from planning and budgeting to construction and final walkthrough.
What to Expect When Working With a Home Builder: 7 Essential Steps to a Successful Build
Building a house is one of the biggest financial and emotional investments most people will ever make, and working with a home builder for the first time can feel overwhelming. Between choosing floor plans, signing contracts, and watching your lot slowly turn into a finished home, there’s a lot happening behind the scenes that most buyers never see coming.
If you’ve never gone through this process before, it helps to know what’s actually involved before you sign anything. A good home builder will walk you through each phase, but understanding the process ahead of time puts you in a much stronger position to ask the right questions, spot red flags, and make decisions with confidence instead of guesswork.
This guide breaks down the entire journey of working with a home builder, from your first meeting to the day you get your keys. We’ll cover planning, budgeting, permits, construction, inspections, and the little details that tend to catch new homeowners off guard. Whether you’re building a custom home from scratch or working from a semi-custom floor plan with a production builder, the fundamentals are largely the same. By the end, you’ll have a realistic picture of the timeline, the costs, and the relationship you’ll be building with your builder over the coming months.
Understanding the Role of a Home Builder
Before diving into the process, it’s worth clarifying what a home builder actually does. A home builder isn’t just someone who swings a hammer. They act as the project manager for your entire build, coordinating architects, subcontractors, suppliers, and inspectors so that everything comes together on schedule and within code.
There are generally two types of builders you’ll encounter:
- Production builders – These companies build in larger developments using a set of pre-designed floor plans with limited customization options. They tend to be faster and more cost-predictable.
- Custom home builders – These builders work with you (and often an architect) to design a home from the ground up, offering far more flexibility but usually at a higher cost and longer timeline.
Knowing which type of builder fits your goals will shape almost everything else about your experience, so this is the first decision worth nailing down.
Step 1: Initial Consultation and Planning
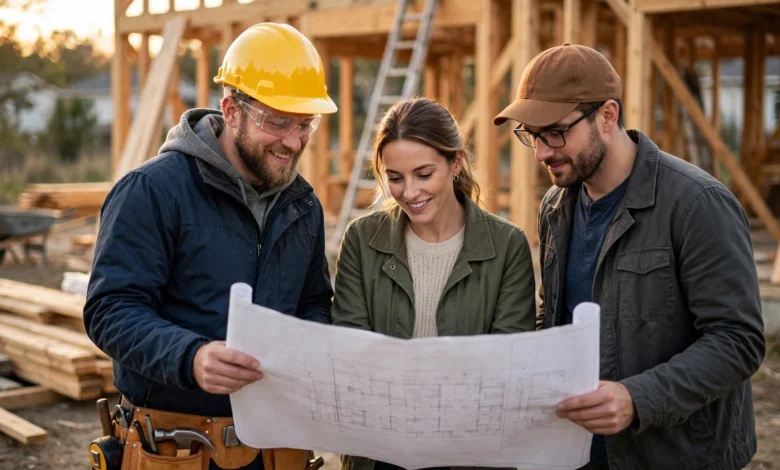
Every build starts with a conversation. During this first meeting, your home builder will ask about your budget, your must-haves, your timeline, and the land you’re building on (if you already own a lot). This is also your chance to ask about their experience, their typical build times, and whether they carry proper licensing and insurance.
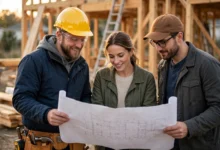

A few things worth confirming early on:
- How many years the builder has been in business
- Whether they’re licensed and insured in your state
- References from past clients, ideally people who built a similar style or size of home
- Their typical communication style during a project (weekly calls, site visits, a project management app, etc.)
Don’t rush this stage. The relationship you build with your home builder now will carry through the entire project, and mismatched expectations here tend to cause frustration later.
Step 2: Budgeting and Contracts
Once you’ve chosen a builder, the next step is nailing down the budget and getting everything in writing. This is arguably the most important part of working with a home builder, because verbal promises don’t hold up when disputes happen.
Your contract should clearly spell out:
- The total price and what it includes (and excludes)
- A detailed list of materials and finishes (often called a “specifications” or “spec” sheet)
- Payment schedule tied to construction milestones
- An estimated timeline with completion date
- Change order procedures and how upgrades are priced
- Warranty terms for workmanship and materials
Change orders deserve special attention. It’s common for homeowners to want to upgrade a countertop or add an extra outlet mid-build, but every change usually comes with an added cost and can push back your timeline. Ask your builder upfront how change orders are priced and documented so there are no surprises on your final invoice.
If you’re financing the build, this is also the point where you’ll want to talk to your lender about a construction loan, which works differently than a standard mortgage. The Consumer Financial Protection Bureau has a helpful breakdown of how construction loans are structured and disbursed in stages as the build progresses.
Step 3: Design and Customization
If you’re working with a custom home builder, this is where the fun really starts. You’ll finalize your floor plan, select finishes, and make decisions on everything from cabinet hardware to roofing material. Even with production builders, there’s usually a design center where you can select from pre-approved options.
Expect to make decisions on:
- Layout and square footage
- Exterior materials (siding, roofing, brick, stone)
- Interior finishes (flooring, countertops, cabinetry, paint colors)
- Fixtures and appliances
- Energy efficiency options like windows and insulation upgrades
A common mistake is underestimating how many decisions are involved at this stage. It’s not unusual to make hundreds of small selections over the course of a few weeks. Ask your home builder for a decision timeline so you know what needs to be finalized and when, which prevents last-minute scrambling that can delay construction.
Step 4: Permits and Approvals
Before a single shovel hits the ground, your builder needs to secure the proper permits from your local municipality. This typically includes building permits, electrical and plumbing permits, and sometimes zoning approvals if you’re building something unusual for the area.
Permit timelines vary widely depending on where you live. In some areas, approval takes a couple of weeks; in others, it can take a couple of months, especially in jurisdictions with a backlog or stricter code requirements. A reputable home builder will factor this into your overall timeline rather than promising an unrealistic start date.
It’s also worth checking whether your homeowners association (HOA), if applicable, has its own approval process for exterior design, which can add another layer of review before construction begins.
Step 5: The Construction Phase
This is the part most people picture when they think about building a house, and it’s typically broken into a few distinct sub-phases.
Site Preparation
Before framing begins, the lot needs to be cleared, graded, and prepped. This includes excavation for the foundation, installing utility lines, and pouring the foundation itself. Weather can significantly affect this stage, so don’t be surprised if there are minor delays due to rain or extreme temperatures.
Framing and Structural Work
Once the foundation cures, framing crews build the skeleton of the house, including walls, roof trusses, and subfloors. This is usually when the home starts to feel “real,” since you can walk through the rooms and see the layout take shape. Rough electrical, plumbing, and HVAC work typically happens right after framing, before the walls are closed up with drywall.
Interior Finishing
After the structural and mechanical work passes inspection, the interior finishing begins. This includes insulation, drywall, flooring, cabinetry, countertops, painting, and fixture installation. This phase tends to move faster than the earlier stages, but it’s also when the finish-level decisions you made earlier really come into play.
Throughout construction, most builders schedule regular site visits or walkthroughs so you can track progress and catch any issues early. Ask your home builder how often you’ll be updated and whether you can visit the site on your own schedule or only during scheduled walkthroughs.
Step 6: Inspections and Quality Control
Inspections happen at multiple points throughout the build, not just at the end. Local building inspectors typically check the foundation, framing, electrical, plumbing, and HVAC systems before each phase is closed up. These inspections protect you as the buyer by making sure the work meets local building codes.
Beyond the official inspections, many buyers choose to hire an independent, third-party inspector at key milestones (particularly pre-drywall and final walkthrough) to get an unbiased second opinion. This is a smart move even when working with a reputable home builder, since an outside inspector has no financial stake in the project and can catch small issues before they become expensive problems.
Step 7: Final Walkthrough and Closing
Once construction wraps up, you’ll do a final walkthrough with your builder to review the completed home. This is your opportunity to create a “punch list,” a list of small items that need correcting before closing, such as paint touch-ups, minor scratches, or fixtures that aren’t working properly.
A trustworthy home builder will address punch list items promptly rather than pushing you to close first and fix things later. Once everything on the list is resolved, you’ll sign off, complete your closing paperwork, and receive your keys.
Don’t overlook the warranty paperwork at this stage. Most builders offer a workmanship warranty (often one year), along with separate warranties on major systems and structural components that can last much longer. Keep all of this documentation somewhere safe, since you’ll need it if issues come up after move-in.
Common Challenges When Working With a Home Builder
Even with a great builder, a few challenges tend to show up in almost every project:
- Delays. Weather, material shortages, and permit backlogs can push back your timeline. Build in some buffer when planning move-out dates from a current home or rental.
- Budget creep. Upgrades and change orders add up quickly. Track every change order in writing as it happens.
- Communication gaps. Miscommunication about finishes or timelines is one of the most common sources of frustration. Weekly check-ins help keep everyone on the same page.
- Subcontractor turnover. Builders rely on a network of subcontractors, and quality can vary between crews. Ask your builder how they vet and manage their subcontractor relationships.
Knowing these challenges ahead of time doesn’t eliminate them, but it does make them easier to handle when they come up.
Tips for a Smooth Home Building Experience
A few practical habits can make a real difference in how smoothly your project goes:
- Put everything in writing, including verbal promises made during meetings.
- Keep a shared folder or binder with your contract, spec sheet, and change orders.
- Visit the site regularly, but respect the builder’s safety protocols.
- Ask questions as soon as something seems unclear, rather than waiting.
- Build a contingency fund of 10–15% above your quoted price for unexpected costs.
- Check in with your builder’s project manager, not just the sales team, once construction starts.
For general guidance on vetting builders and understanding industry standards, the National Association of Home Builders offers consumer resources that can help you compare builders and understand typical practices in the residential construction industry.
Conclusion
Working with a home builder is a process built on clear communication, realistic expectations, and careful documentation at every stage. From the first planning conversation through budgeting, design, permitting, construction, inspections, and the final walkthrough, each step plays a role in how smoothly your project comes together and how happy you’ll be with the finished home. By understanding what’s ahead, asking the right questions early, and staying involved throughout the build, you can turn what feels like an overwhelming process into a manageable and even enjoyable experience, ending with a home that was truly built around your needs.