How to Design a Bathroom That Feels Bigger Than It Is
Design a bathroom that feels bigger with proven layout, tile, mirror, and lighting tricks that make small spaces look and live larger.
How to Design a Bathroom That Feels Bigger Than It Is
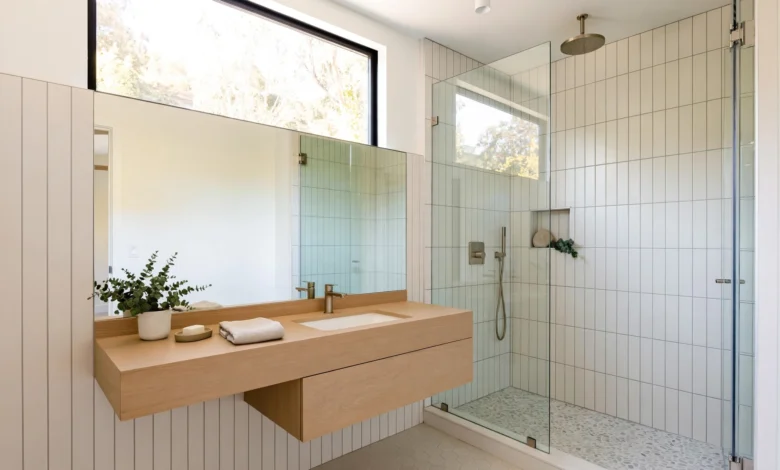
Design a bathroom that feels bigger and you solve one of the most common frustrations in home design without ever moving a wall. Most people assume the only way to fix a cramped bathroom is to knock down the wall and steal square footage from a closet or bedroom next door. That’s rarely necessary, and it’s often not even the most effective fix. A small bathroom, handled with the right combination of layout, materials, color, and light, can feel calm and open rather than boxed in, while the same room with a few common missteps feels cramped no matter how much was spent on finishes.
This guide breaks down the specific, tested techniques designers actually use to make a small bathroom look bigger, from tile orientation and mirror placement to the psychology of color and the quiet power of a glass shower enclosure. None of these ideas require adding square footage. They rely on how the eye reads a space, where light travels, and which visual barriers can be removed or softened without sacrificing function.
Whether you’re planning a full remodel or just want to rework what you already have, the goal here is the same: help you make decisions that genuinely change how the room feels to stand in, not just how it photographs. Every tip below is something you can plan for before construction starts, so you get the payoff without guessing after the tile is already set.
Why Small Bathrooms Feel Smaller Than They Are
Before getting into solutions, it helps to understand why a small bathroom feels cramped in the first place. It’s rarely just the square footage. It’s usually a combination of:
- Visual clutter that breaks the room into too many small zones instead of one continuous space.
- Poor lighting that leaves shadows and dark corners, making the room feel closed in.
- Solid, bulky fixtures like a heavy vanity or framed shower door that block sightlines.
- Small-format tile with dense grout lines that visually chop up the floor and walls.
- Dark or busy colors that absorb light rather than bounce it around the room.
Once you know what’s working against the space, it’s much easier to see why the fixes below actually work, rather than treating them as decorating tricks.
1. Choose Layout Before You Choose Finishes
Layout is the foundation of a bathroom that feels bigger. Positioning the basin near the entrance keeps the room feeling open as you walk in, while larger elements like the tub or shower are best pushed toward the back of the room. Thinking through sightlines and circulation before you fall in love with tile samples will save you from a beautiful bathroom that still feels tight to move through.
Layout Moves That Open Up the Room
- Keep the path from the door to the far wall as clear as possible.
- Push the largest fixture (tub or shower) to the wall furthest from the entrance.
- Avoid placing a tall cabinet or linen tower directly in the sightline from the door.
- Where plumbing allows, consider a corner sink or corner shower to free up floor space.
2. Scale Up Your Tile, Don’t Scale It Down
It’s a common instinct to think a small bathroom needs small tile, but the opposite is usually true. Larger-format tile reduces the number of grout lines, creating broader, quieter surfaces that let the eye move freely across the walls and floor instead of catching on a grid of seams. Rectangular tiles in particular can be used to manipulate perceived proportions:
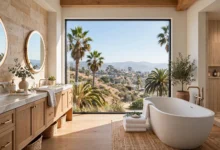
- Running tile horizontally elongates the walls and makes a narrow room feel wider.
- Stacking tile vertically adds visual height, which helps with low ceilings.
- Extending floor tile up the walls (especially in the shower or behind the vanity) removes the visual break between floor and wall, making the whole room read as one continuous surface.
3. Let the Floor Read as One Continuous Surface
Following on from tile choice, continuity matters just as much as scale. When the same flooring material runs from the main bathroom floor into the shower without a threshold or a change in material, the eye doesn’t register where one zone ends and another begins. This single decision does more to make a small bathroom feel larger than almost any other design choice, because it removes a visual boundary the brain would otherwise use to measure the room as smaller than it is.
4. Go Frameless (or Skip the Door Entirely)
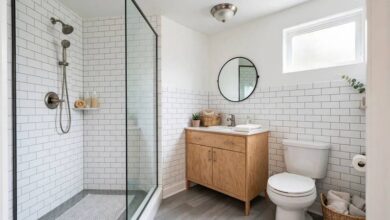
A bulky framed shower enclosure is one of the biggest culprits behind a bathroom feeling chopped up. A frameless glass enclosure removes that visual barrier almost entirely, letting the eye travel through the shower space as though it’s part of the same room rather than a separate box. The bathroom reads as one unified volume, and the floor area feels noticeably larger than the same square footage behind an opaque door or curtain.
Where privacy is a concern, lightly frosted or reeded glass keeps most of that spatial openness while still providing screening. If your layout and budget allow it, a curbless, doorless walk-in shower takes the idea even further and removes the barrier completely.
5. Use Mirrors Strategically, Not Just Decoratively
A mirror does more than let you check your hair. It’s one of the most effective tools available for adding the illusion of depth to a small bathroom.
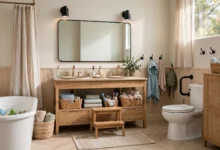
- A full-width mirror above the vanity creates the impression that the space extends beyond the wall behind it.
- Hanging a mirror facing a window maximizes how much natural light it reflects back into the room.
- An oversized mirror that runs close to the ceiling makes the wall it’s on nearly disappear.
- Two mirrors placed across from each other can create a sense of space repeating outward.
Don’t default to a small, boxy mirror just because the room is small. In this case, bigger genuinely is better.
6. Layer Your Lighting
Lighting affects how spacious a bathroom feels almost as much as layout does. A single overhead fixture leaves shadows in the corners, and shadows read as smaller, tighter space. Layered lighting fixes that:
- Task lighting at the mirror, ideally sconces on either side rather than a single fixture overhead, which avoids harsh shadows on the face and the room.
- Ambient overhead lighting to fill in the rest of the room evenly.
- Accent lighting, such as a strip light under a floating vanity or inside an open shelf, which adds depth and a sense of dimension.
- A dimmer switch, so brightness can be adjusted depending on the time of day and how open you want the room to feel.
Bright, white light bounces off tile and mirrors more effectively than warm or dim lighting, which is part of why well-lit bathrooms consistently photograph and feel larger than dim ones of the same size.
7. Choose a Light, Cohesive Color Palette
Color has a direct effect on how a room’s boundaries are perceived. Light, cohesive colors reflect light around the room, while dark or busy color combinations tend to visually shrink the space by absorbing light and creating contrast that draws attention to the room’s actual edges.
- Whites and soft neutrals on walls and ceiling make a bathroom feel bigger by keeping the eye from stopping at any one point.
- A gloss or semi-gloss paint finish reflects more light than a flat finish.
- If you want color, an accent wall paired with crisp white trim and simple fixtures keeps the room from feeling boxed in the way an all-over saturated color scheme can.
- Keeping the same tone across walls, ceiling, and even trim removes visual breaks that would otherwise define the room’s actual boundaries.
8. Float Your Vanity and Fixtures
Solid, floor-to-ceiling cabinetry blocks sightlines and visually shortens the floor. A wall-mounted or floating vanity does the opposite: it leaves floor space visible underneath, which reads as more usable square footage even though the actual footprint hasn’t changed.
The same logic applies to the toilet. A wall-mounted toilet, where plumbing allows, opens up floor space near one of the smallest but most visually busy zones in a typical bathroom.
- Choose open shelving instead of solid cabinet doors where storage needs allow.
- If a floating vanity isn’t in the budget, at minimum choose a vanity with slim, raised legs rather than one that sits flush to the floor.
- Keep the areas under and around fixtures visible rather than boxed in.
9. Edit Down What’s Visible
Clutter is one of the fastest ways to make even a genuinely large bathroom feel cramped. Every visible bottle, towel, and loose item adds a small amount of visual noise, and in a small room that noise adds up quickly.
- Use closed storage (drawers, a mirrored medicine cabinet, or a slim linen tower) for everything that doesn’t need to be on display.
- Corral what does stay visible, like toothbrushes or soap, into a few coordinated trays or baskets rather than scattering it across the counter.
- Keep towel bars and hooks intentional rather than adding extra ones wherever there’s a gap in the wall.
A clean, edited counter reads as more spacious than a cluttered one, even in an identical footprint.
10. Maximize Natural Light
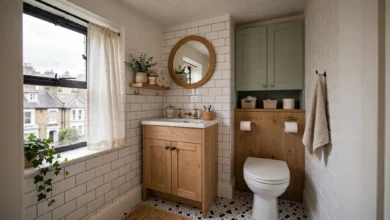
If your bathroom has a window, don’t cover it with a heavy curtain or frosted film unless privacy genuinely requires it. Natural light does more to open up a room than almost any artificial fixture can replicate.
- Use sheer or minimal window coverings where privacy allows.
- Position mirrors to catch and reflect whatever natural light is available.
- If privacy is a concern, consider frosted glass or a top-down, bottom-up shade that lets light in from the top while still screening the lower half of the window.
11. Draw the Eye Upward
Low ceilings are one of the harder constraints to work around, but a few tricks help counteract that sense of a room pressing in.
- Vertical tile lines or wainscoting draw the eye upward, giving the impression of more height.
- Painting the ceiling the same light color as the walls removes the visual line where the wall stops and the ceiling begins.
- A pendant or flush-mount fixture in a slim profile avoids visually lowering the ceiling the way a bulky fixture can.
12. Keep Fixtures Proportional, Not Just Smaller
There’s a common myth that everything in a small bathroom needs to shrink to match the room. In reality, a few oversized elements, like the mirror or light fixtures discussed above, often do more for the sense of space than uniformly scaling everything down. The fixtures that should actually shrink are the ones that take up floor space and block movement, like an oversized vanity or a bulky freestanding tub. Choosing carefully where to go bigger and where to go smaller is what separates a bathroom that feels intentionally designed from one that just feels tight.
For more detailed guidance on tile selection and layout for compact spaces, the Home Depot’s small bathroom design resource and Floor & Decor’s small bathroom guide both offer useful visual references for pairing these ideas with real material choices.
Common Mistakes That Undo These Efforts
Even with the right intentions, a few habits quietly work against a bathroom that feels bigger:
- Choosing small-format tile because it seems like the safer choice for a small room.
- Overcrowding the counter with decorative items that add clutter rather than character.
- Skipping the mirror upgrade and keeping a small, dated mirror out of habit.
- Adding a bulky framed shower door when a frameless option would have opened the room significantly.
- Ignoring lighting layers and relying on a single, harsh overhead fixture.
Avoiding these missteps is just as important as applying the tips above, since one bulky element or dark corner can undercut several good decisions made elsewhere in the room.
Conclusion
Learning how to design a bathroom that feels bigger comes down to a consistent set of choices: planning the layout before the finishes, scaling tile up rather than down, letting flooring flow continuously into the shower, choosing frameless glass over a bulky enclosure, and using mirrors, light, and color deliberately rather than as an afterthought. None of these changes require adding square footage, and most cost little to nothing extra when planned from the start of a renovation. Applied together, they turn a small bathroom from a space people tolerate into one that feels calm, open, and genuinely enjoyable to use every day.