How to Plan a Whole-Home Renovation in 6 Simple Steps
Planning a whole-home renovation? Follow these 6 simple steps to set your budget, choose a design, and hire the right team with confidence.
How to Plan a Whole-Home Renovation in 6 Simple Steps
A whole-home renovation is one of the biggest projects a homeowner can take on, and it’s also one of the easiest to get overwhelmed by if you don’t break it down into manageable pieces. Unlike a single-room remodel, a full house renovation touches nearly every system in your home, from structural work and electrical to finishes in every room, which means the planning phase carries a lot more weight than people expect going in.
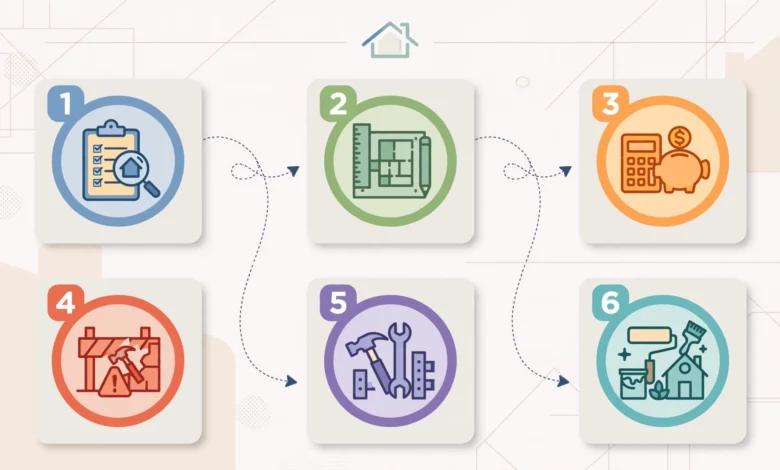
The good news is that a whole-home renovation doesn’t have to feel chaotic if you approach it methodically. Most successful projects follow the same general sequence: define your goals, set a realistic budget, nail down your design, hire the right team, sort out permits and logistics, and then manage the build itself. Skipping or rushing any one of these steps tends to show up later as delays, budget overruns, or a finished space that doesn’t quite match what you pictured.
This guide walks through six simple steps for planning a full house renovation from start to finish, based on how experienced renovation professionals and design-build firms structure their own project timelines. Whether you’re renovating a fixer-upper you just purchased or updating a long-time family home, these steps apply regardless of your home’s size or the scope of work involved. By the end, you’ll have a clear roadmap for turning your renovation plans into an organized, achievable project. Let’s start with the step that shapes everything else: defining your goals.
Step 1: Define Your Goals and Vision
Before you contact a single contractor or browse a single design idea, get clear on why you’re renovating and what success actually looks like for your household. This is the foundation every other decision in your whole-home renovation will rest on.
Start by asking yourself:
- What isn’t working about your current home? Outdated layouts, insufficient space, poor energy efficiency?
- Are you renovating to stay long-term, or to increase resale value before selling?
- Which rooms or systems matter most, and which are lower priority?
- Who lives in the home now, and how might that change in the next five to ten years?
A useful exercise here is building two lists: your must-haves and your nice-to-haves. Must-haves are the non-negotiables, things like an additional bathroom for a growing family or replacing a failing roof. Nice-to-haves are the upgrades you’d love but could live without if the budget gets tight. Having this distinction sorted early makes every later decision, from design tradeoffs to value-engineering conversations with your contractor, much faster and less stressful.
Step 2: Set a Realistic Renovation Budget
Budget is where most home renovation projects succeed or struggle, so this step deserves real time rather than a rough number pulled from a quick online search. A well-built budget protects you from the two most common outcomes of poor planning: running out of funds mid-project, or making rushed decisions just to stay on track.


Break your budget down by major category:
- Structural and system work – roofing, foundation repairs, electrical, plumbing, and HVAC
- Labor – your general contractor and any specialized subcontractors
- Materials and finishes – flooring, cabinetry, countertops, fixtures, and paint
- Permits and inspections
- Contingency fund – set aside at least 10-15% of your total budget for unexpected costs, which show up far more often than homeowners expect once walls come open
Once you know your target budget, look into financing options if you’re not paying entirely in cash. Common choices include a home equity loan, a HELOC, or a dedicated renovation loan, each with different rates, repayment structures, and qualification requirements. The Consumer Financial Protection Bureau offers a clear breakdown of home equity loan and HELOC options that’s worth reviewing before you commit to a financing method.
Structural Priorities Come First
If your budget is tight, prioritize structural and system repairs before cosmetic upgrades. A beautifully finished kitchen sitting on top of a failing foundation or outdated wiring isn’t a good trade-off. Addressing roofing, foundation issues, and major systems first sets a stable base for everything that follows, even if it means postponing some of the more exciting finish decisions.
Step 3: Plan Your Design and Layout
With goals and budget in place, it’s time to translate your vision into an actual design. This is where most homeowners start working with an architect, interior designer, or design-build firm, depending on the scope of the project.
Key decisions at this stage include:
- Whether you’re keeping the existing floor plan or making structural changes, like removing walls or adding square footage
- How rooms flow into each other, especially if you’re moving toward a more open-concept layout
- Where natural light enters the home, and whether window placement needs to change
- Material and finish selections for each space, kept consistent with an overall style direction
If your whole-home renovation includes an addition or significant structural changes, this phase typically takes longer than people anticipate. It’s common for design development, including revisions and approvals, to take several weeks to a few months depending on complexity. Building that time into your overall project timeline now avoids frustration later.
Working With a Design-Build Firm vs. Separate Architect and Contractor
You generally have two paths here. A design-build firm manages both design and construction under one roof, which often means smoother communication and a single point of accountability. Working with a separate architect and contractor gives you more flexibility to choose specialists for each phase, but requires more coordination on your end to keep everyone aligned. Neither approach is universally better, it depends on how hands-on you want to be and how complex your renovation is.
Step 4: Hire the Right Contractor and Design Team
Your contractor and design team will shape nearly every part of your renovation experience, so this step deserves real diligence. A home renovation is only as good as the people executing it, regardless of how strong the design plans look on paper.
When vetting contractors, ask about:
- Licensing, insurance, and bonding appropriate for your state or region
- A portfolio of completed projects similar in scope to yours
- References from recent clients you can actually contact
- How they handle change orders, delays, and unexpected costs
- Their typical communication style and how often you’ll receive updates
The National Association of the Remodeling Industry provides resources on vetting and hiring a qualified remodeling contractor, including questions to ask and red flags to watch for, which is a solid reference point regardless of which contractor you ultimately choose.
A good contractor will ask you just as many questions as you ask them, particularly about your must-haves, budget flexibility, and timeline expectations. If someone skips past those questions to jump straight into a sales pitch, treat that as a signal to keep looking.
Step 5: Handle Permits, Logistics, and Living Arrangements
Before construction can start, there’s a round of practical logistics to sort out that’s easy to underestimate during the excitement of the design phase.
Permits typically required for a whole-home renovation include:
- Building permits for structural changes
- Electrical and plumbing permits for system upgrades
- Mechanical permits for HVAC changes
- Zoning approval if you’re adding square footage
Most contractors or design-build firms handle the permit process on your behalf, but it’s worth confirming who’s responsible and building the approval timeline into your overall schedule, since processing times vary significantly by municipality.
You’ll also need to plan around the practical realities of construction:
- Living arrangements – decide whether you’ll stay in the home during construction or need temporary housing, especially if kitchens or bathrooms will be out of commission
- Storage – arrange storage for furniture and belongings that need to be cleared from work areas
- Site access – confirm your property is accessible for equipment, deliveries, and dumpsters
- Utilities – plan for any temporary disruptions to water, power, or gas during major system work
Sorting these details out before demolition begins keeps the actual construction phase from stalling on logistics that could have been handled weeks earlier.
Step 6: Manage the Renovation Through to Completion
Once construction starts, your role shifts from planning to active project management, even if you’re not swinging a hammer yourself. Staying engaged throughout the build keeps small issues from becoming expensive ones.
Habits that make a real difference:
- Schedule regular walkthroughs or check-ins with your contractor, ideally weekly
- Keep a written record of decisions, approvals, and any change orders as they come up
- Ask for clarification any time a cost or timeline estimate shifts from what was originally discussed
- Stay flexible; delays around material lead times or unexpected repairs are common in full home renovations, and a little built-in patience goes a long way
- Do a thorough final walkthrough before signing off, checking every room against your original design plans
A whole-home renovation rarely goes exactly according to the original schedule, but staying involved and communicative throughout construction is the single biggest factor in how smoothly the process feels, regardless of how many surprises come up along the way.
Conclusion
Planning a successful whole-home renovation comes down to working through it in a clear, deliberate sequence rather than trying to tackle everything at once. Start by defining your goals and separating your must-haves from your nice-to-haves, then build a realistic budget with room for the unexpected. From there, nail down your design, hire a contractor and design team you genuinely trust, sort out permits and living logistics before demolition begins, and stay actively engaged once construction is underway. Following these six steps won’t eliminate every challenge that comes with renovating an entire home, but it will give you the structure to handle them without losing sight of the finished space you set out to create.