How to Start Composting in Your Backyard
A practical guide to starting a backyard compost system, covering bins, materials, layering, troubleshooting and finished compost use.
How to Start Composting in Your Backyard: 9 Simple Steps for Amazing Results
Introduction
How to start composting in your backyard is one of those questions that sounds simple until you actually try it and end up with a smelly, slimy pile instead of the rich, crumbly soil you were promised. The good news is that composting isn’t complicated once you understand a few basic principles. Most failed attempts come down to the same handful of mistakes, like too much food waste and not enough dry material, or a pile that never gets turned.
This guide walks through everything you need to get started, from choosing the right bin for your space to troubleshooting the inevitable hiccups along the way. Whether you’ve got a big backyard or just a small courtyard, there’s a composting method that will fit, and the payoff is worth it. You’ll cut down on kitchen waste heading to landfill, save money on soil conditioner and fertiliser, and give your garden beds a genuine nutrient boost.
We’ll cover the science in plain terms, the exact materials you need, step-by-step setup instructions, and how to keep your compost healthy through the seasons. By the end, you’ll have a clear, realistic plan rather than a vague idea of “just throw scraps in a bin.”
Why Composting Matters
Before getting into the how, it’s worth understanding the why, because it makes the process easier to stick with.
Reducing Landfill Waste
Organic waste sent to landfill doesn’t break down the way it would in a compost pile. Instead, it decomposes without oxygen and produces methane, a greenhouse gas significantly more potent than carbon dioxide. According to the U.S. Environmental Protection Agency, food scraps and yard waste make up a large share of what typically ends up in landfill, and diverting even a portion of that through home composting makes a measurable difference. You can read more detail on this through the EPA’s composting overview.
Building Healthier Soil
Finished compost, often called “black gold” by gardeners, improves soil structure, boosts water retention, and feeds beneficial microorganisms. Unlike synthetic fertilisers, compost releases nutrients slowly and improves soil health over time rather than offering a quick, temporary fix.
Understanding the Basics of How Composting Works
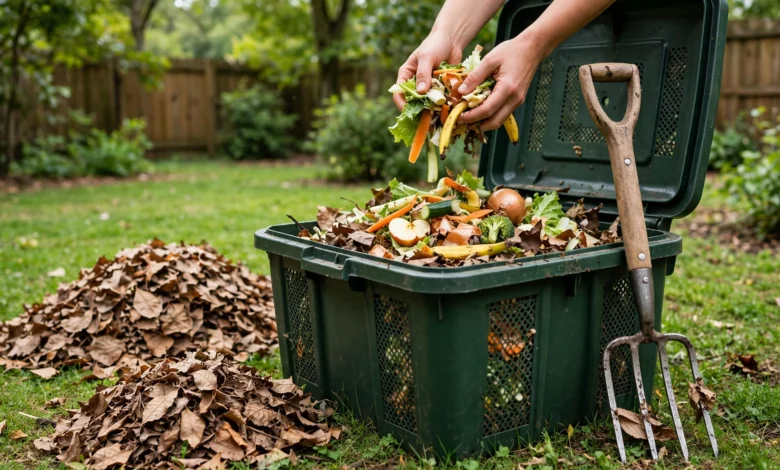
Composting is essentially controlled decomposition. Microorganisms, worms, and other decomposers break down organic material into a stable, nutrient-rich substance. To do their job well, they need four things: carbon, nitrogen, moisture, and oxygen.
The Carbon to Nitrogen Balance
Composting materials generally fall into two categories:
- Greens (nitrogen-rich): vegetable scraps, coffee grounds, grass clippings, fresh plant trimmings
- Browns (carbon-rich): dry leaves, cardboard, straw, shredded paper, small twigs
A rough ratio of roughly two to three parts browns to one part greens keeps the pile balanced. Too many greens and the pile turns slimy and smelly. Too many browns and decomposition slows to a crawl.
Moisture and Aeration
Your compost pile should feel like a wrung-out sponge, damp but not dripping. Turning the pile every one to two weeks introduces oxygen, which speeds up decomposition and prevents the anaerobic conditions that cause bad odours.
Choosing the Right Composting Method for Your Backyard
Not every backyard is the same size, and the composting method should match the space and effort you’re willing to put in.
Traditional Compost Bins
A simple enclosed bin is a good option for most suburban backyards. It’s low-cost, keeps pests out reasonably well, and works fine with occasional turning.
Tumbler Composters
Tumbler bins sit on a frame and can be rotated by hand, making turning far easier than digging into an open pile. They tend to produce compost faster, though they usually hold smaller volumes than open bins.
Open Pile Composting
If you have a larger backyard and don’t mind an exposed pile, this is the cheapest option. It requires more manual turning with a fork or shovel and needs to be positioned away from fences or neighbours to avoid complaints about smell.
Worm Farms (Vermicomposting)
For small backyards or even balconies, a worm farm is a compact alternative. Red wriggler worms break down food scraps efficiently and produce worm castings, a particularly potent form of compost, along with liquid “worm tea” that can be diluted and used as a liquid fertiliser.
Step-by-Step: How to Start Composting in Your Backyard
Here’s a practical walkthrough for setting up your first compost system.
1. Choose a Location
Pick a spot that’s partially shaded, has good drainage, and is reasonably close to your kitchen so you’ll actually use it. Avoid low-lying areas that pool water after rain.
2. Select Your Bin or System
Match the bin type to your space and effort level, as outlined above. If you’re unsure, a simple enclosed bin is the easiest starting point for beginners.
3. Start With a Base Layer
Lay down a layer of coarse material like small twigs or straw at the bottom. This helps with drainage and airflow from the base of the pile.
4. Alternate Greens and Browns
Build your pile in rough layers, alternating nitrogen-rich greens with carbon-rich browns. You don’t need to be precise, but keeping the ratio roughly in mind prevents most common problems.
5. Add Water as Needed
Lightly moisten dry layers as you build the pile. If your climate is particularly dry, you may need to water the pile occasionally, especially during summer.
6. Turn the Pile Regularly
Every one to two weeks, turn the pile with a fork or spin the tumbler. This distributes moisture, introduces oxygen, and speeds up decomposition considerably.
7. Monitor Temperature and Smell
A healthy, actively decomposing pile often feels warm in the centre and smells earthy, not rotten. If it smells bad, it usually needs more browns and a good turn.
8. Be Patient
Depending on the method, temperature, and how often you turn it, compost typically takes anywhere from two months to a year to fully mature. Tumblers and well-managed piles tend to be on the faster end.
9. Harvest and Use the Finished Compost
Finished compost is dark, crumbly, and smells like fresh earth, with no recognisable scraps left. Use it to enrich garden beds, top up potting mix, or spread as mulch around established plants.
What You Can and Can’t Compost
Getting this list right early on avoids most beginner problems.
Materials You Can Compost
- Fruit and vegetable scraps
- Coffee grounds and tea leaves (bags removed if not compostable)
- Eggshells, crushed
- Dry leaves and untreated cardboard
- Grass clippings and plant trimmings
- Shredded paper (non-glossy)
Materials to Avoid
- Meat, fish, and dairy, which attract pests and produce strong odours
- Oils and fats
- Diseased plants, which can spread pathogens back into your garden
- Pet waste from carnivorous animals
- Treated or painted wood
Troubleshooting Common Composting Problems
Even a well-managed pile runs into issues occasionally, and most have simple fixes.
The Pile Smells Bad
This usually means too much moisture or too many greens relative to browns. Add dry carbon material like shredded cardboard and turn the pile to introduce air.
The Pile Isn’t Breaking Down
A pile that’s too dry or too cold will decompose slowly. Add water, turn it more frequently, and make sure the pile is large enough (roughly a cubic metre) to generate heat.
Pests Are Getting Into the Bin
Avoid adding meat, dairy, or oily foods, and consider a fully enclosed bin design if rodents or possums are a recurring issue in your area.
The Pile Attracts Flies
Fruit flies are usually drawn to exposed food scraps. Bury fresh additions under a layer of browns each time you add to the pile.
Seasonal Composting Tips
Composting behaviour shifts with the seasons, and adjusting your approach keeps the process moving year-round.
Warm Weather
Decomposition speeds up in heat, but piles can dry out faster too. Check moisture levels more often and water lightly if the pile feels dry.
Cold Weather
Decomposition slows significantly in cold conditions. Insulating the pile with extra browns or moving to an enclosed bin can help maintain some activity through winter, though it’s normal for things to slow down considerably.
Using Finished Compost in Your Garden
Once your compost is ready, there are several effective ways to put it to use:
- Mix it into vegetable garden beds before planting to boost soil fertility
- Use it as a top dressing around existing plants and shrubs
- Blend it with potting mix for container gardening
- Spread a thin layer over lawns as a natural soil conditioner
The Royal Horticultural Society offers additional guidance on applying compost effectively across different garden settings, which is worth reviewing through their composting advice page if you want more detail on specific applications.
Conclusion
Learning how to start composting in your backyard doesn’t require special equipment or a science degree, just a basic understanding of the balance between greens, browns, moisture, and airflow. Whether you choose a simple bin, a tumbler, an open pile, or a worm farm, the fundamentals stay the same: build the pile thoughtfully, turn it regularly, and be patient while nature does the rest. The payoff is real, less waste heading to landfill, healthier soil, and a steady supply of nutrient-rich compost for your garden. Start small, learn from the inevitable trial and error, and within a few months you’ll have a system that runs almost on its own.