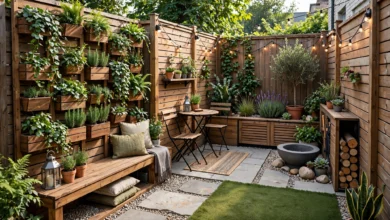
How to Build an Outdoor Fire Pit Area
How to build an outdoor fire pit area step by step, from picking a safe spot to choosing materials for a backyard that gets used all year.
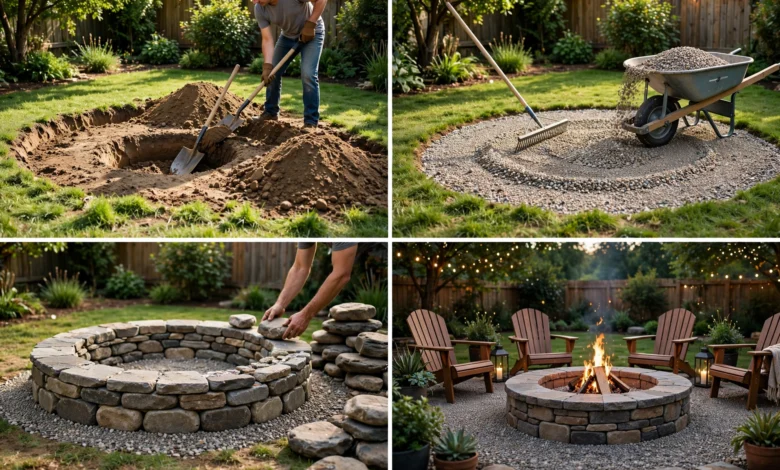
How to Build an Outdoor Fire Pit Area: 7 Easy Steps for a Stunning Backyard Retreat
Introduction
If you’ve ever sat around a fire on a cool evening and thought “I need one of these at home,” you’re not alone. An outdoor fire pit area is one of the few backyard projects that pays you back almost immediately. It doesn’t need a huge budget, it doesn’t take a professional crew, and once it’s done, you’ll probably use it more than any other part of your yard.
But there’s a difference between just digging a hole and tossing in some rocks, and actually building a fire pit area that looks good, holds up over time, and doesn’t turn into a safety headache. Location matters. Materials matter. So does knowing what your local fire codes actually say before you strike the first match.
This guide walks through the whole process of how to build an outdoor fire pit area, from picking the right spot and fire pit style, to laying the base, building the walls, and finishing the space with seating that makes people want to stick around. Whether you’re going for a simple gravel-and-stone setup or a full patio with built-in benches, the steps below will get you there. Let’s get into it.
Why Build an Outdoor Fire Pit Area
Before jumping into the how-to, it’s worth understanding why this project is worth the weekend. A well-planned fire pit area adds real value to your home, both in terms of resale and in terms of how much you’ll actually use your yard. According to the National Association of Realtors, outdoor living features like fire pits and patios consistently rank among the improvements homeowners enjoy most after installation.
Beyond resale value, there’s the everyday appeal. A fire pit gives your family a reason to be outside after dinner instead of scattering to separate rooms. It stretches your outdoor season into fall and even winter in milder climates. And it turns an otherwise unused corner of the yard into the spot everyone gravitates toward.
Step 1: Choose the Right Location
The location you pick will shape everything else about your outdoor fire pit area, so don’t rush this part.
Distance From Structures
Most local codes require a fire pit to sit at least 10 to 25 feet away from your house, fences, sheds, and any overhanging trees or branches. Always check your specific municipality’s rules, since they vary quite a bit. The National Fire Protection Association publishes general outdoor fire safety guidance that’s a good starting point if your city doesn’t have detailed regulations posted.


Wind and Drainage
Pick a spot that’s naturally flat or can be leveled without major excavation. Avoid low points in your yard where water pools after rain, since a soggy fire pit base will crack and shift over time. Also pay attention to prevailing wind direction. You don’t want smoke blowing straight into your seating area or toward a neighbor’s windows every evening.
Ground Surface
Building directly on grass isn’t ideal. You’ll want a surface that can handle heat and won’t scorch, which usually means gravel, pavers, concrete, or stone.
Step 2: Check Local Codes and Permits
This step gets skipped more often than it should, and it’s the one that causes the most headaches later. Before you buy a single brick, call your local building or fire department and ask about:
- Minimum setback distances from property lines and structures
- Whether a permit is required for permanent fire pits
- Restrictions on wood-burning fires during dry seasons
- Rules specific to homeowners associations, if you have one
Some areas only allow gas or propane fire pits due to burn bans, especially in drought-prone regions. It’s a lot cheaper to find this out now than after you’ve built a wood-burning pit you can’t legally use.
Step 3: Decide on the Type of Fire Pit
There isn’t one right answer here. It really comes down to how you plan to use the space.
Wood-Burning vs. Gas Fire Pits
Wood-burning fire pits give you that classic crackle and smell, and they tend to feel more like a traditional campfire. The tradeoff is more maintenance, more smoke, and less control over the flame.
Gas fire pits light instantly, burn cleaner, and let you adjust the flame with a knob. They cost more upfront, especially if you run a gas line, but many homeowners find the convenience worth it.
In-Ground vs. Above-Ground Fire Pits
- In-ground fire pits are built flush with or below the surrounding patio, often ringed with stone or brick. They blend into the landscape but can be trickier to keep dry.
- Above-ground fire pits sit on top of the ground and are usually easier to build, drain better, and are simpler to modify later if you change your mind about the design.
For most DIY projects, an above-ground stone or paver pit is the easiest route and still looks great.
Step 4: Gather Your Materials
Once you’ve settled on a design, here’s a general materials list for a standard outdoor fire pit area:
- Fire pit ring or heat-resistant fire brick
- Paver base or crushed gravel for the foundation
- Landscape fabric to block weeds
- Sand for leveling
- Retaining wall blocks, natural stone, or fire brick for the walls
- Construction adhesive rated for outdoor use
- A rubber mallet and level
- Optional: metal fire pit insert for added durability
If you’re going the gas route, add a gas line kit, a fire glass or lava rock fill, and a burner pan to the list, and consider hiring a licensed plumber to handle the gas connection.
Step 5: Build the Fire Pit Base
Here’s the step-by-step process for building the base of your fire pit:
- Mark the area. Use a rope or garden hose to outline the shape and size of your fire pit, typically 36 to 44 inches in diameter for a comfortable seating radius.
- Excavate the space. Dig down about 6 to 8 inches within the marked circle to make room for the gravel base.
- Add landscape fabric. Lay it across the excavated area to prevent weeds from pushing through later.
- Pour and compact gravel. Add 4 to 6 inches of crushed gravel, then tamp it down firmly to create a stable, well-draining foundation.
- Level with sand. Add a thin layer of sand on top and screed it flat so your first course of blocks sits evenly.
A solid base is the single biggest factor in whether your fire pit stays level and safe for years, so don’t rush through this stage.
Step 6: Build the Walls
With the base ready, it’s time to build up:
- Lay the first course. Place your fire brick or blocks around the perimeter, checking level constantly as you go.
- Stagger the joints. For each additional row, offset the block seams from the row below for added strength, similar to laying regular bricks.
- Use adhesive between courses. A bead of outdoor construction adhesive between each layer keeps the structure from shifting.
- Insert a metal ring, if using one. A steel fire pit insert protects the inner stone from direct heat damage and makes ash cleanup much easier.
- Build to your desired height. Most fire pits sit between 12 and 18 inches tall, which keeps the flame visible while sitting and still feels safe.
Step 7: Finish the Surrounding Area
The fire pit itself is only part of the project. The space around it is what turns a hole full of rocks into an actual outdoor fire pit area people want to spend time in.
Flooring
Extend a patio surface, whether it’s pavers, gravel, or poured concrete, out several feet from the pit to create a stable, non-flammable zone for furniture.
Seating
Options range from built-in stone benches to a simple circle of Adirondack chairs. If you want flexibility, go with moveable furniture so you can rearrange the space for different group sizes.
Lighting
Low-voltage path lights or string lights add ambiance without competing with the fire itself.
Landscaping
Frame the space with plants that won’t drop flammable debris nearby. Ornamental grasses, low shrubs, and potted plants placed a safe distance away all work well. This Old House has a helpful outdoor living design overview if you want more inspiration for tying the fire pit into your broader backyard layout.
Safety Tips for Your Outdoor Fire Pit Area
A fire pit is only as good as the precautions around it. Keep these in mind:
- Keep a hose or bucket of water and a fire extinguisher within reach at all times.
- Never leave a lit fire pit unattended, even for a few minutes.
- Avoid burning treated or painted wood, which releases harmful chemicals.
- Keep flammable furniture cushions, blankets, and decorations a safe distance from the flame.
- Extinguish fires completely, stirring the ashes to make sure no embers remain, before heading inside.
- Check wind conditions before lighting a fire, and skip it altogether on very windy days.
Maintenance Tips to Keep Your Fire Pit in Good Shape
A little upkeep goes a long way toward keeping your fire pit area looking good and functioning safely for years:
- Clean out ash regularly, since a buildup can trap moisture against the metal or stone.
- Cover the pit when not in use to prevent water damage and rust.
- Inspect stone or brick joints each spring for cracks or shifting.
- For gas pits, check the burner and connections annually for wear or leaks.
- Reseal natural stone surfaces every couple of years if your climate sees heavy rain or snow.
Conclusion
Building an outdoor fire pit area doesn’t have to be complicated, but it does reward a bit of planning. Pick a safe, level location, check your local codes before you dig, choose a fire pit style that fits how you actually plan to use it, and take the time to build a solid gravel base before stacking any stone. From there, it’s really about finishing touches: comfortable seating, some soft lighting, and a bit of landscaping to tie the space together. Do it right, and you’ll end up with the one part of your yard that gets used every single week, no matter the season.