Bathroom Renovation Tips for Homeowners in California
Bathroom renovation tips for California homeowners covering permits, materials, layout, and budget so your remodel avoids costly surprises.
Bathroom Renovation Tips for Homeowners in California
Bathroom renovation projects in California come with a unique set of challenges that homeowners in other states simply don’t deal with. Between strict Title 24 energy codes, seismic retrofit requirements, aggressive permitting timelines, and labor costs that run well above the national average, a bathroom remodel California homeowners attempt without preparation can turn into an expensive headache fast. Older homes, especially anything built before 1980, often hide rotted subfloors, outdated plumbing, and even asbestos behind the tile, and none of that shows up until demolition starts.
This guide walks through what actually matters when you’re planning a bathroom renovation in California, from the first design decision to the final inspection. You’ll find practical advice on choosing a licensed contractor, picking materials that hold up against hard water and humidity, understanding what permits you actually need, and where your budget is best spent versus where it’s wasted. None of this is generic advice pulled from a national home improvement blog. It’s built around the specific realities of remodeling in this state: the climate, the codes, and the cost of skilled labor here.
Whether you’re updating a small guest bath or gutting a master suite down to the studs, the goal of this article is simple: help you make smart decisions before the sledgehammers come out, so you end up with a bathroom that’s beautiful, functional, and built to last for decades rather than one that needs to be redone in five years because a corner got cut somewhere it shouldn’t have.
Why Bathroom Renovation in California Is Different
Remodeling a bathroom anywhere involves plumbing, electrical, and moisture control. In California, you’re also dealing with California building codes that are among the strictest in the country, plus a housing stock that varies wildly by decade and region. A 1960s ranch home in the Central Valley has different structural quirks than a 1920s bungalow in the Bay Area or a stucco tract home in Southern California.
A few things set California apart:
- Title 24 energy and water requirements. California’s building code mandates specific standards for insulation, ventilation, lighting efficiency, and water fixtures. Low-flow toilets, showerheads, and faucets aren’t optional upgrades here, they’re the baseline. You can review the current standards through the California Energy Commission’s Title 24 program.
- Seismic considerations. Older homes may need bracing or retrofitting work touched during a remodel, particularly if plumbing runs through load-bearing walls.
- Water scarcity. With recurring drought conditions, water-efficient fixtures aren’t just code, they’re practical. The EPA WaterSense program is a useful reference for fixtures that meet both California standards and long-term efficiency goals.
- Higher labor costs. Skilled plumbers, electricians, and tile setters in California markets like Los Angeles, San Diego, and the Bay Area charge significantly more than the national average, which affects your overall bathroom remodel cost.
Understanding these differences upfront changes how you plan your budget, timeline, and scope, and it’s why copying a Pinterest board without a local reality check tends to backfire.
Step 1: Set a Realistic Budget
Before you fall in love with a marble vanity or a rain shower system, figure out what you can actually spend and where that money needs to go first.


What Drives Bathroom Remodel Costs in California
Several factors push California remodel costs higher than in most other parts of the country:
- Labor rates. Licensed trades in major metro areas often charge 20 to 40 percent more than the national average.
- Permit fees. Cities vary, but permitting for plumbing and electrical work adds real cost and time.
- Material shipping and demand. Popular tile and stone often gets shipped from out of state, adding to lead times and cost.
- Hidden structural issues. Older homes frequently reveal problems once walls come down, and these repairs are rarely optional.
A small guest bathroom refresh might run a modest amount if you’re keeping the existing layout and swapping finishes. A full bathroom remodel with a new layout, moved plumbing, and higher-end materials will cost considerably more. As a rule of thumb, build in a contingency of at least 15 to 20 percent above your target budget for surprises, because in a state with this much older housing stock, something usually comes up.
Where to Spend and Where to Save
- Spend on: waterproofing, ventilation, plumbing quality, and structural repairs. These are invisible once the project is done, but they determine whether your bathroom lasts 20 years or leaks within five.
- Save on: decorative hardware, light fixtures, and accessories, which are easy and inexpensive to swap later without touching plumbing or tile.
Step 2: Understand California Permit Requirements
Not every bathroom project needs a permit, but more do than most homeowners expect. Generally, if you’re moving plumbing fixtures, changing electrical circuits, or altering the structure (like removing a wall), you’ll need permits from your local building department.
Skipping permits might seem like a shortcut, but it creates real problems:
- Unpermitted work can complicate a future home sale, since buyers’ inspectors and lenders often flag it.
- Insurance claims related to water damage can be denied if the work wasn’t permitted.
- You lose the safety net of an inspector catching a mistake before it’s sealed behind drywall.
Before hiring anyone, ask your bathroom remodel contractor directly what permits the project requires and confirm they’ll pull them. A contractor who suggests skipping permits to save time is a warning sign, not a convenience.
Step 3: Hire the Right Contractor
This is where most bathroom renovation projects succeed or fail. California requires contractors performing work over $500 (labor and materials combined) to hold an active license through the Contractors State License Board (CSLB). Always verify a contractor’s license status directly through the CSLB website before signing anything.
Questions to Ask Before Hiring
- Are you licensed, bonded, and insured for this type of work in this county?
- Can you provide references from at least three recent bathroom renovation projects in this area?
- Will you handle permitting, or is that on me?
- What’s your process for unexpected issues found during demolition?
- What’s the payment schedule, and does it follow California’s progress payment rules?
Red Flags to Watch For
- Pressure to pay a large deposit upfront (California law limits deposits to 10 percent of the contract price or $1,000, whichever is less, for most home improvement contracts).
- No written contract, or a contract with vague scope of work.
- Reluctance to provide a license number or insurance certificate.
- Prices that are dramatically lower than every other quote you received.
Getting three quotes from licensed, insured contractors isn’t just good practice, it’s the single best way to avoid the horror stories that fill up California home renovation forums.
Step 4: Prioritize Function Before Style
It’s tempting to start with tile samples and fixture finishes, but a bathroom renovation that ignores layout and function ends up looking great in photos and feeling frustrating to actually use. Nail down these basics first, then layer in the aesthetics.
Non-Negotiables for a Functional Bathroom
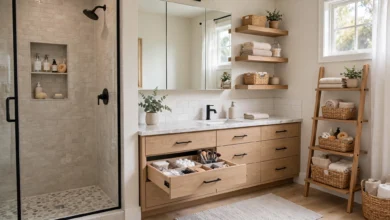
- Adequate storage. A medicine cabinet, vanity drawers, and linen storage keep the space usable day to day. Clutter undermines even the most beautifully designed bathroom.
- Proper ventilation. A quality exhaust fan is required by code and essential for controlling moisture, which prevents mold and protects your finishes over time.
- Good lighting. Layer task lighting at the mirror with ambient overhead lighting to avoid harsh shadows.
- Comfortable clearances. Code minimums often feel cramped in real life. Where your layout allows, add a few extra inches around the toilet, shower entry, and vanity.
Common Layout Mistakes to Avoid
- Placing the vanity too close to the door, creating a bottleneck.
- Choosing a shower that looks striking but is too small for comfortable daily use.
- Ignoring the swing radius of the door when planning fixture placement.
- Underestimating how much space a double vanity actually needs for two people to use it at once.
Step 5: Choose Materials Built for California’s Climate
Bathrooms deal with water, steam, soap residue, and heavy daily use, so materials need to be chosen for performance first and looks second. This matters even more in coastal California, where humidity and salt air add extra wear.
Best Flooring and Wall Options
- Porcelain tile. Dense, moisture-resistant, and available in styles that mimic natural stone or wood without the maintenance headaches.
- Natural stone (with sealing). Beautiful, but requires regular sealing to resist staining and etching from acidic products.
- Large-format tile. Fewer grout lines mean less maintenance and a cleaner look, which many homeowners find worth the slightly higher installation cost.
- Quartz surfaces. A strong choice for vanity tops and shower walls, since quartz resists staining and doesn’t need sealing.
Fixtures Worth the Investment
- Low-flow toilets and showerheads that meet California’s water efficiency standards while still performing well.
- Quality faucets and valves from established brands, since replacing a failed valve behind finished tile is far more expensive than buying a better one upfront.
- Anti-scald shower valves, which are required by code in most California jurisdictions and are simply good practice for household safety.
Step 6: Plan for Moisture Control and Waterproofing
This is the part of a bathroom remodel that nobody sees once it’s finished, and it’s also the part that determines whether you’re dealing with mold and rot in three years. Proper waterproofing membranes behind tile, correctly sloped shower pans, and sealed grout lines are not areas to cut corners.
Ask your contractor specifically about:
- What waterproofing membrane system they use behind tile in wet areas.
- How they handle the shower pan slope to ensure proper drainage.
- What ventilation capacity (measured in CFM) the exhaust fan provides relative to your bathroom’s square footage.
A bathroom that looks stunning but traps moisture behind the walls is a far more expensive problem to fix later than it would have been to prevent from the start.
Step 7: Think About Accessibility and Long-Term Use
Many California homeowners are renovating with an eye toward aging in place, whether for themselves or aging family members. Building in accessibility now often costs little extra compared to retrofitting later.
Consider:
- A curbless or low-threshold shower entry.
- Grab bars installed into properly blocked studs, even if you don’t need them yet.
- A comfort-height toilet.
- Slip-resistant flooring, particularly in the shower and around the tub.
These changes don’t have to look clinical. Well-designed accessible bathrooms today blend seamlessly into a modern, spa-like aesthetic.
Step 8: Time Your Renovation Wisely
Contractor availability in California fluctuates by season. Spring and early summer tend to be the busiest booking periods, which can mean longer wait times and higher demand pricing. Scheduling a bathroom renovation in the fall or winter, when demand softens in many markets, sometimes results in better contractor availability and more competitive pricing.
Also plan around your household’s daily needs. If you only have one bathroom, talk to your contractor about phasing the work or setting up a temporary solution, since most remodels take anywhere from three to six weeks depending on scope.
Frequently Overlooked Details That Make a Big Difference
- Electrical outlets near the vanity with GFCI protection, placed at a height that’s actually convenient to use.
- Heated flooring, which is a relatively affordable add-on during a full remodel and a genuine comfort upgrade.
- Exhaust fan timers, which keep the fan running long enough after a shower to fully clear moisture without you needing to remember to turn it off.
- Niche shelving built into the shower wall, planned during the framing stage rather than added as an afterthought.
Conclusion
A successful bathroom renovation in California comes down to preparation: setting a realistic budget with room for surprises, understanding which permits your project actually requires, hiring a licensed and properly insured contractor, and choosing materials built to handle moisture and daily wear rather than just good looks in a showroom. Layout and function should come before finishes, waterproofing deserves as much attention as tile selection, and small details like ventilation, lighting, and accessibility can make the difference between a bathroom you love using every day and one that just looks good in photos. Take the time to plan each of these steps carefully, and your renovation is far more likely to become a lasting improvement to your home rather than a costly lesson learned.
Keywords: